
Arts Flowers Background in Photoshop
PSD Quick

Step 1
Open Photoshop and create a new image with a size that is similar to 900x280 px.
Step 2
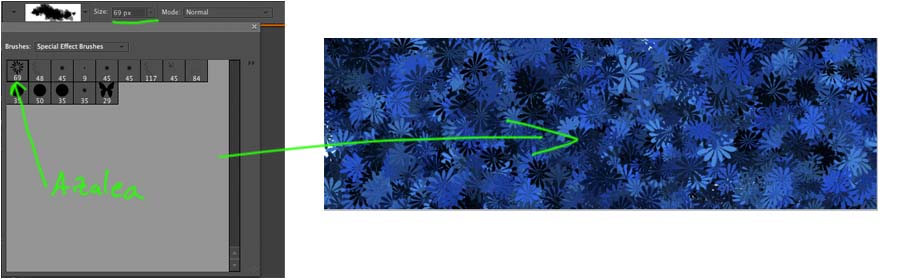
Select the brush tool. Choose #0070ed as foreground-color and black as background
color. Choose "Special Effect Brushes" and choose the Azalea-brush. Select a size of about 70px. Draw on
the background-layer until you've filled the whole image.
Step 3
Select the gradient tool. Use "foreground to background" (black to transparent) and choose "Radial Gradient". Reduce the opacity to 53%. Create a gradient from left to right, and a smaller one from right to left.

Step 4
Add your big, white, custom Text. We used the Capitals font and a font-size of 120pt. You can also add a small, gray shadow. Capitals is a basic Apple font, but you can download it too.